Index
Flask… what is it?
In my previous article we saw how to simply maintain the training of a machine learning model through persistence. The objective is now to publish and use a model through an external program or better still a web application.
If you are focusing on a micro-service type architecture for example, it will seem logical to use REST services. And imagine that this is good because there is a fairly magical Python micro-framework for this: Flask .
Why Magic?
Quite simply because Flask, unlike its competitors ( Django , Pylons , Tornado , Bottle, Cherrypy, Web2Py, Web.py, etc.) is a framework of disconcerting simplicity and efficiency. In this article, I suggest you check it out for yourself.
In addition, it is 100% Open-Source… so what more could you ask for?
Small (light) but strong Flask allows the addition of additional components but also integrates a real template engine to associate HTML / CSS layers. In this article we will only focus on the REST aspects of this framework and we will mainly see how to use it in a pragmatic way to call a Machine Learning model.
Installing Flask
Working on Linux / Ubuntu you will only have to type in a shell:
sudo apt-get install python python-pip
sudo apt-get install python3-flask
sudo pip install flask
For those who persist on Windows (really ?) I suggest to install Anaconda first, then install the Flask module via the browser ( Anaconda ).
As for Apple / MAC fans, here are the commands to run:
curl -O http://python-distribute.org/distribute_setup.py
python distribute_setup.py
easy_install pip
pip install flask
The really great thing about Flask is that you don’t need to install a web server. You will create a Python script which will first listen on an HTTP port and which will distribute the URLs to your code. And this in a few lines of code.
Your very first service
Our first service will respond to a GET request and will only display a string of characters.
from flask import Flask
app = Flask(__name__)
@app.route('/')

def index():
    return "Hello datacorner.fr !"

if __name__ == '__main__':
      app.run(debug=True, host='0.0.0.0', port=8080)
Some explanations, by line:
- Line (1): Import / reference of the Python Flask module
- Line (2): Creation of the Flask application, the __name__ reference will later be used to manage several instances.
- Line (3): Creation of a route. A route is in a way the mapping of the REST URL that will be called with the Python function.
- Line (5-6): This is the function called across the route above.
- Lines (8-9): Launch of Flask which then goes on hold
- on the specified port: 8080
- in debug mode (very practical, we will see in particular that this mode makes it possible to take into account the backups over time and directly).
- on host 0.0.0.0
Save this file in a file with a * .py extension (especially do not name it flask.py on the other hand in which case you would have an error). In my case I called it: flask_test.py
Launch a shell (command line) and type:
python flask_test.py
The command should specify the host and port on which Flask is queuing:
$ python flask_test.py
 * Serving Flask app "flask_test" (lazy loading)
 * Environment: production
   WARNING: Do not use the development server in a production environment.
   Use a production WSGI server instead.
 * Debug mode: on
 * Running on http://0.0.0.0:8080/ (Press CTRL+C to quit)
 * Restarting with stat
 * Debugger is active!
 * Debugger PIN: 212-625-496
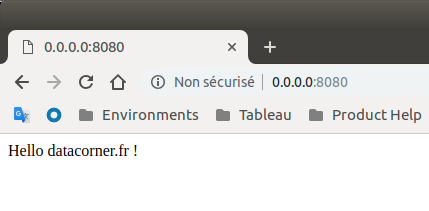
Open a web browser and type the url: http://0.0.0.0/8080, you should observe the response:

Call your model with Flask
Step 1: Calling up a model with training
from flask import Flask
import pandas as pd
from sklearn import linear_model
from joblib import dump, load

app = Flask(__name__)

def fitgen():
    data = pd.read_csv("./data/univariate_linear_regression_dataset.csv")
    X = data.col2.values.reshape(-1, 1)
    y = data.col1.values.reshape(-1, 1)
    regr = linear_model.LinearRegression()
    regr.fit(X, y)
    return regr

@app.route('/fit30/')
def fit30():
    regr = fitgen()
    return str(regr.predict([[30]]))

if __name__ == '__main__':
      app.run(debug=True, host='0.0.0.0', port=8080)
In this example we create a REST / GET service which allows to train a model (that of the article on the persistence of Machine Learning models ), and to return a prediction value on the fixed value 30. Once the command Python launched your browser should display on the URL http://0.0.0.0:8080/fit30
[[22.37707681]]
Step 2: The parameterization is made via the URL the value to predict
For this we will use the possibility of “variability” the Flask routes. For that we must add a parameter in the route (between
<pre class="wp-block-syntaxhighlighter-code">from flask import Flask
import pandas as pd
from sklearn import linear_model
from joblib import dump, load

app = Flask(__name__)

def fitgen():
    data = pd.read_csv("./data/univariate_linear_regression_dataset.csv")
    X = data.col2.values.reshape(-1, 1)
    y = data.col1.values.reshape(-1, 1)
    regr = linear_model.LinearRegression()
    regr.fit(X, y)
    return regr

@app.route('/fit/<prediction>')
def fit(prediction):
    regr = fitgen()
    return str(regr.predict([[int(prediction)]]))

if __name__ == '__main__':
      app.run(debug=True, host='0.0.0.0', port=8080)</pre>
Let’s run the Python command and open a browser. Type the URL http://0.0.0.0:8080/fit/30
The same result as before should be displayed.
Step 3: Let’s make the prediction with a model already trained
For this, we refer to the article on the persistence of Machine learning models . We will now speed up the performance using a model already trained:
<pre class="wp-block-syntaxhighlighter-code">from flask import Flask
import pandas as pd
from sklearn import linear_model
from joblib import dump, load

app = Flask(__name__)

@app.route('/predict/<prediction>')
def predict(prediction):
    regr = load('monpremiermodele.modele')
    return str(regr.predict([[int(prediction)]]))

if __name__ == '__main__':
      app.run(debug=True, host='0.0.0.0', port=8080)</pre>
We changed the route, so type in your browser the URL http://0.0.0.0:8080/fit/30 to get the same answer as before. See above all the performance gain by changing the value.
You are therefore equipped to create REST services that will use your machine learning models. As usual the source codes are available on GitHub .


